For designer, the cardboard boxes design work mainly include draft design and some prepress works:
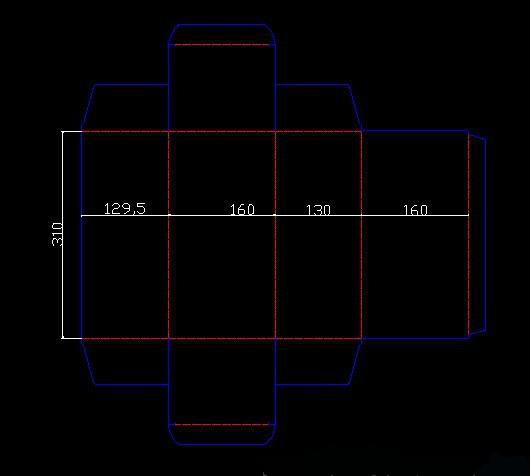
1> Confirm the cardboard type and the size of the cardboard box, for example, if the product size is 150*120*300, the designer should bear in mind the virtue spaces to input and out the product. The preliminary width of the flat pattern would be: 160+130+160+130, here we do not consider seal width and offset. The hight of the cardboard box can be 310 according to the same reason, then the length, width and hight of the packaging box would be 160*130*310. According to the weight of the product the designer can choose related cardboard type because the cost must be take into consideration here. For example if we choose 350g ivory board here, caliper 0.5mm.
2>Drawing the die line according to requirements with CAD software. Offset shouldn't be ignored during this process.
 .
.Lots of people in packaging industry might not know much about the cardboard box structure, or haven't spent too much time drawing the box structure on the computer, here we can try Packmage CAD software, first user need to download and install it. Then we can login the software choose box template from the library.
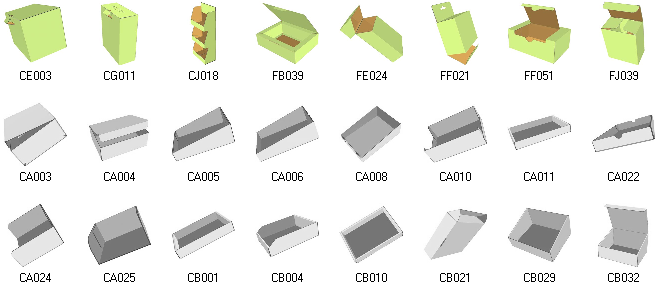
In Packmage CAD software library, all the box templates are listed as folding, unfolding and half-folding status, the colored boxes have been activated, the gray boxes need to be activated, and the box templates are classified as material, structural and usages, which is more intuitive and easy for user to select the right box template. If we chose FJ039 for example.
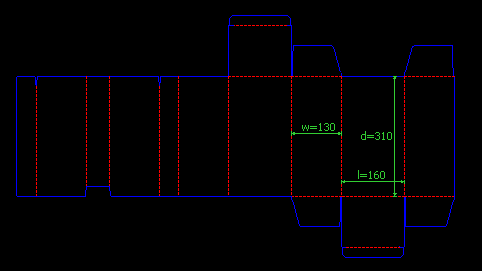
Modify the length, width and depth with 160,130 and 310. caliper 0.5. Once the box structure confirmed, it can be exported as DXF format directly from packmage CAD software, ordinary laser die-cutter has CAD plug in for bridges and calculate the total length of die-line and folding line.
The next step is to design draft. Designer can import the structural design into photoshop for graphic design. Then import the graphic design into Packmage CAD software to match with the structural design to check the 3D color sample. When the final design confirmed, if the quantities of the boxes are huge, it should proofing first, there should have prototype machine, also called box cutting machine.
There are two more processes called Film and Print plate need to be done before producing the box. There're 3 ways to check the final effect before printing:
1> Get the high definition draft before film(It's cheap but not so accurate);
2>Get few digital print samples, after confirmed then start film and printing if the quantities are huge, else digital print directly.
3>Ask the film company print few samples when making film, that's the most traditional way, the cost is a little expensive and time consuming.
Software might be used: Photoshop and AI for graphic design, Step and repeat(CDR, In design, Quarkxpress etc.)
After this step, we will need to make printing template and send to printing factory for massive production. The last step is Packing, all the cardboard boxes are flattened and packaged into the boxes to falicitate transportation.
During these steps, the hardware machine need to be used include: Computer, printing-down machine, print machine, prototype machine, laser die-cutter, Zapi machine and glued machine.
Software: AI,PS, CDR and Packmage CAD software work together to save time.